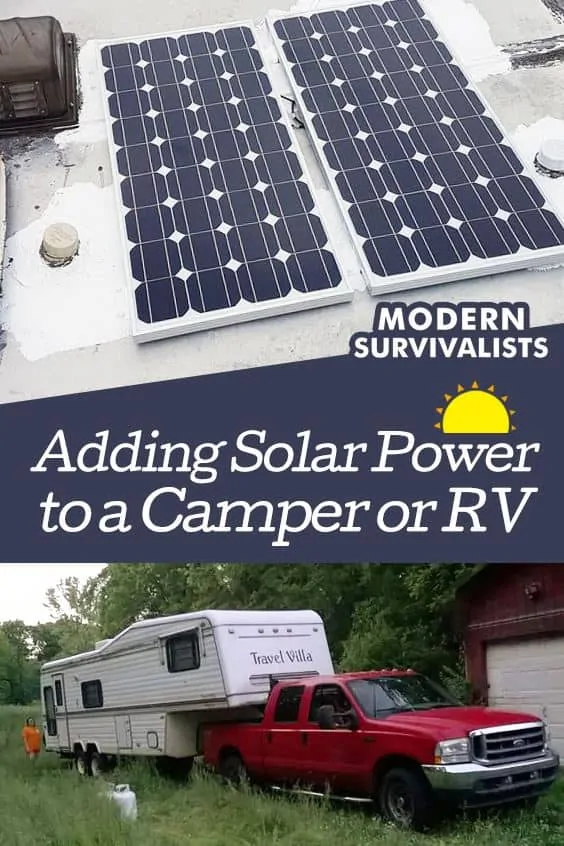
We purchased an ’86 Travel Villa 29′ fifth wheel camper as an inexpensive means to travel out west with our dogs. The camper is an older model, but it has served us well. After building the solar generator, I have found that I always want to bring it with us when we travel as we typically boon-dock without hookups.
I have decided I would like to add a dedicated solar power system to the camper. This way the camper will always be ready to go, and the dedicated solar panels will also keep the camper’s existing deep-cycle battery topped off when not in use.
Selecting the Solar Power Equipment
We will use a 200 Watt Solar Starter Kit from Renogy which includes two 100 watt panels, the mounts, and a 30 Amp PWM solar charge controller, as well as the necessary wiring. I used the 100 watt Renogy kit when I built the solar generator project, and I was happy with both the quality and the cost.
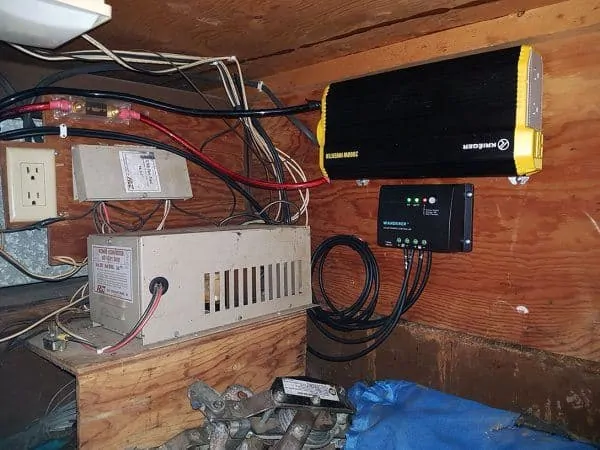
We will also use the same 2,000 watt Kreiger power inverter that I used for the solar generator. In fact, it is the same unit which I removed from the solar generator. The reason being is that it seems they are no longer selling the 2,000 watt version. I want to purchase the 3,000 watt version to replace into the solar generator as an update, so the older 2,000 model needs a new home anyway. The wiring and installation process is the same for either model.
Below is a list of components used in this post and their current Amazon prices.
(If you are using an Ad Blocker, the list may not show)
Determining Placement of Components
This is probably the most difficult part of the entire installation. It will also vary from one model camper or RV to another. The panels will be mounted to the roof, and will have two wires that lead to wherever the solar charge controller is installed.
The solar charge controller will also have two wires that lead to the camper’s battery / battery bank. The same is true for the power inverter. So usually you will want the power inverter and the solar charge controller located very close to the battery compartment.
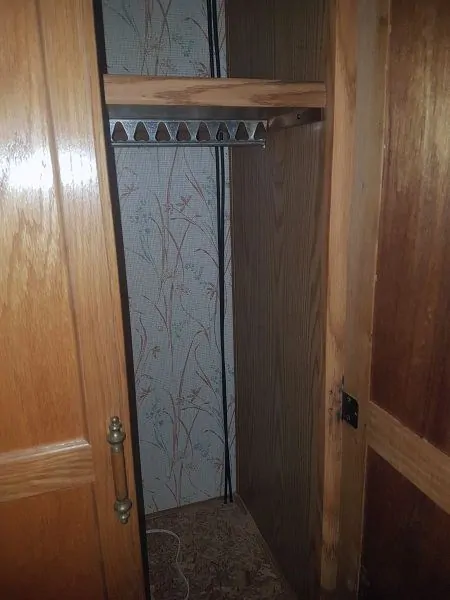
For me the ideal location was the large storage compartment / basement located just behind the fifth wheel portion that overhangs the tow vehicle. I also found that just above this compartment was one of the closets in the master bedroom of the camper. This was a great place to conceal the two wires from the roof and route them into the storage compartment below through the closet floor.
Route the Solar Panel Cables and Battery Cables
Once you have a placement strategy, carefully drill the necessary holes and run the two solar panel cables along the planned route. By doing this first, we can make sure the route will work as planned before we have mounted any of the other components.
If possible, avoid securing the cables until after the panels and charge controller are installed. It is convenient to be able to adjust the amount of wire on either end when wiring everything up. Use rubber grommets whenever the wire is passing through any sheet metal. We will also be sealing the exterior holes when finished with the install.
When the solar panel cables are routed, do the same for the battery cables. Do not actually connect them to the battery yet, to minimize the chances of a short while working, but be sure to leave enough length by the battery for easy hook up. If you are using the Renogy kit wires (which are both black) make sure to label the one you intend to use as the positive cable on both ends to avoid confusion later.
Mount the Solar Panels
I mounted my two solar panels on the downhill portion of the camper roof, behind the master bedroom / overhang portion. I chose this place because it seemed like it would see less wind shear when traveling on the freeway.
I considered adding a small trim piece / spoiler to the leading edge of the panels to prevent wind from getting underneath / below the panel, but it has not seemed necessary at least for my installation. I have inadvertently tested my camper at speeds of up to 85 mph on our last trip, and the panels still seem nice and secure.
I purchased a gallon of white flex-seal to seal off both the exterior wiring as well as the mounting holes for the panels. You won’t need an entire gallon for this, but I bought that because I intend to coat the entire roof as well since it is an older camper.
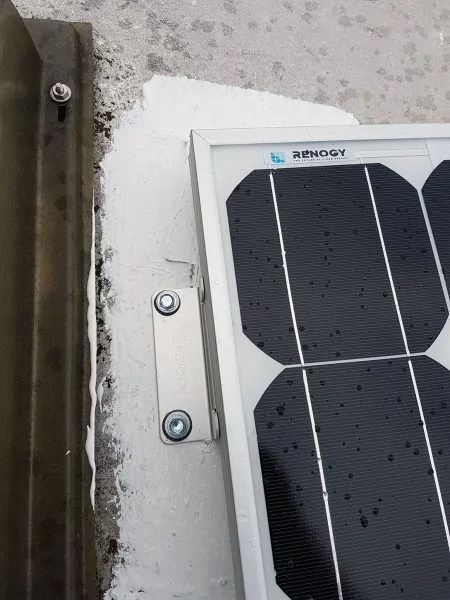
The solar panels come with four brackets each. They worked well for my installation. Each bracket attaches to the panels with included bolts, washers, and lock washers. Be sure to tighten these snugly, as you will not want them coming loose on the road!
Once you have the brackets installed to the panels, position them on the roof to determine the best placement. Them mark the roof where each bracket rests. Temporarily move the panels out of the way and put a thick coat of flex seal where each bracket rested. This will help to seal the mounting holes, as well as keep the brackets from rubbing / abrading against the camper or RVs metal roof.
When the flex-seal has started to cure (full cure is not necessary) position the panels back into their final locations, and secure with short metal roofing screws. Metal roofing screws include a rubber sealing washer, but I recommend adding a second coat of flex-seal over the entire bracket as good measure. This may also prevent the screws from working themselves loose over time.
Double check that the interior ends of the solar panel cables are not shorted against anything, and then connect the roof side connectors to the panels. The Renogy starter kit includes the MC4 adapters needed for connecting two panels. Secure the roof portion of the cable neatly under the panels and to its pass thru grommet. I added another coat of flex-seal to all of the roof top wire and its pass-thru grommet to stabilize it and ensure no water leaks.
Installing the Solar Charge Controller
Mount the solar charge controller with its included screws near the wires we have already run. Don’t connect the cables just yet! The order of connection matters.
The first thing to connect is the battery wires to the charge controller. Make sure you connect the positive and negative wires to the correct screw-clamp connectors marked for the battery.
The positive wire should also be fused before it connects to the battery. If you are using two panels, use a 15A fuse. This charge controller can handle up to four panels, in which case you would use a 30A fuse. I used a spare fuse location from the campers existing fuse block, but you can also purchase and install either an inline fuse, or a mounted fuse block like we used in the solar generator build.
Now that the battery cables are fused and connected to the charge controller, we can go ahead and connect the battery side of those cables to the campers battery. Once that is connected you should see the battery status light on the charge controller light up. Now is also a good time to set the battery type on the charge controller as well. This setting will optimize the charge controllers various charging modes for that type of battery.
The last step for wiring the solar charge controller is to connect the solar panel cables to the charge controller. If you are not sure which wire is the positive and negative, it is best to use a volt meter to test them first. Once they are properly connected, the solar panel LED on the charge controller should illuminate to indicate the solar panels are connected and working.
Installing the AC Power Inverter
If you have decided to install the an AC power Inverter to the camper as well, it is fairly straight forward. The Kreiger kit I used is nice because it comes with the heavy gauge power wire, a nice fuse block, and a handy remote switch that can be mounted inside the camper for turning the inverter on and off.
The battery cable connections are very straightforward, just be sure to use the included fuse block, and add a rubber grommet anywhere the wires need to pass thru sheet metal.
Warning! Before the AC Power Inverter is wired into the camper’s existing electrical system, some considerations need to be made. It is very important that the camper is never plugged into a shore power hookup while the inverter is also connected. The same is true if your camper/ RV is equipped with a generator. Two way and three way transfer switches are available to safely allow you to leave the inverter permanently connected into the AC electrical system. If the inverter is wired directly to the campers AC system, the shore power cord on your camper may also have live AC voltage on the male end of the cord when the inverter is turned on.
If you do not want to purchase a transfer switch, you should use the camper’s shore power cord to connect to the AC inverter output receptacle. This way the energized shore power cord is not a shock hazard, and it also prevents you from accidentally connecting to another power source at the same time.

I’ve been looking for photos and articles on this topic over the past few days due to a school assignment, baccaratsite and I’m really happy to find a post with the material I was looking for! I bookmark and will come often! Thanks 😀
Solar panels are one of the most eco-friendly, quietest and cleanest power source. Outfitting your vehicle with a solar panel makes it possible for you to enjoy the benefits of free source of power. In fact, a good and reliable RV solar power installation gives you the opportunity of charging your batteries independently.
I am hoping to put two 600w happy time wind turbines and 8 250w panel roof and drivers side and 10 12v 35Ah marine batteries banked in a relay for what I hope will be totally energy independence. What do you think?
It would be going on a 28’ 1990 jamboree rv!
Sounds like a really nice setup Andrew! I don’t yet have any experience with wind turbines, but would like to play with some soon. 2,000 watts of solar (peak direct sunlight) and potentially another 1,200 watts from wind even through the night sounds like it should go a long ways towards your goal! It all of course depends on how much power you use as well. Good luck with the project and please report back how well it works for you!