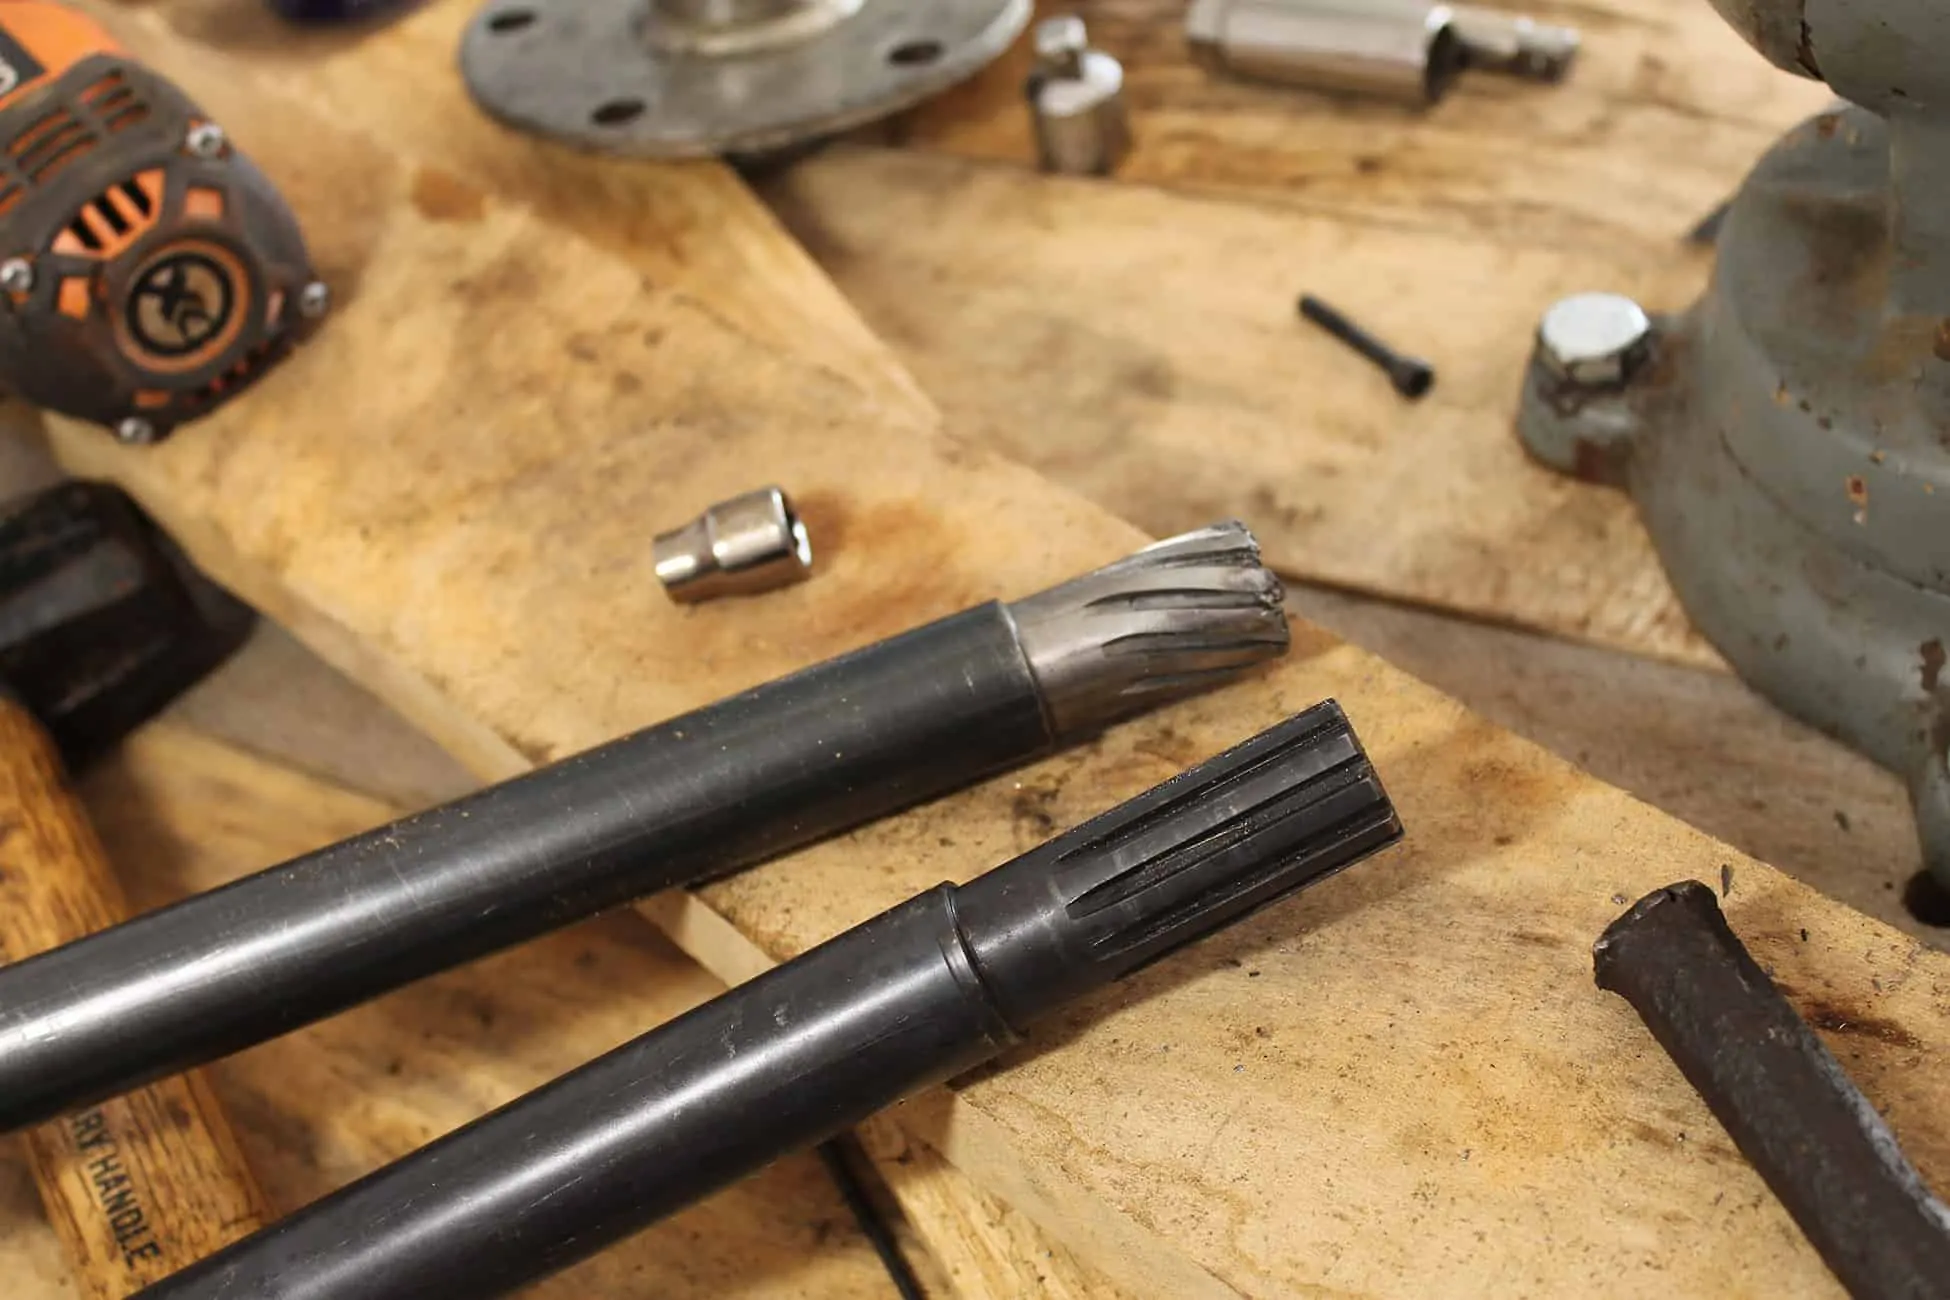
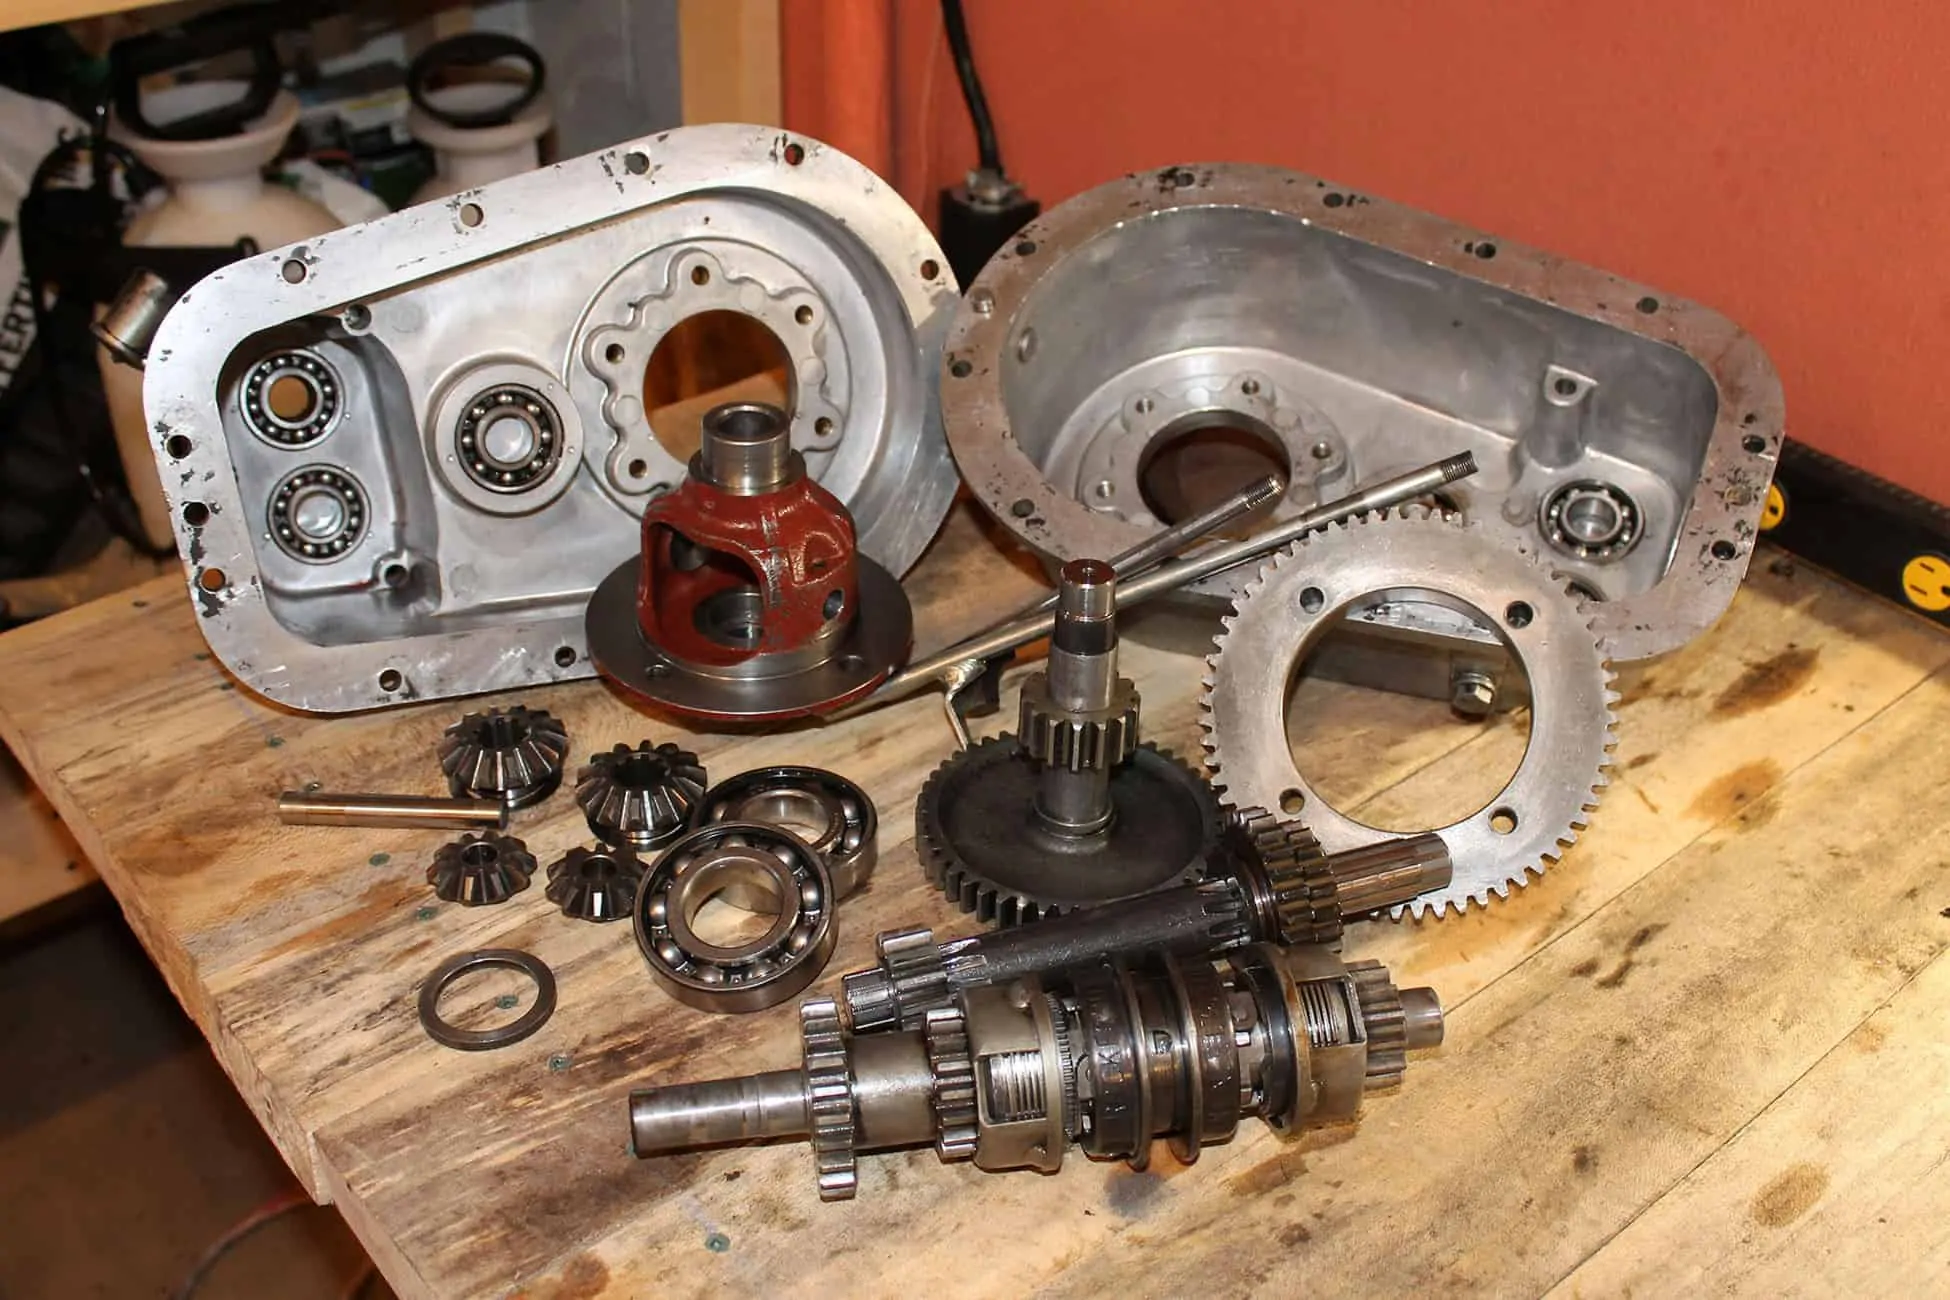
I snapped an axle shaft in my Yazoo Mower (YR-76) that required disassembling the entire transmission in order to get the broken shaft out. While it was out, I cleaned each part, and replaced worn bearings and oil seals. Here is the process I took.
Remove the Transmission from the Mower
Usually, you would jack up the machine and place it on jack stands. Drain the oil from the transmission. Then remove the wheels, brakes, and then the hubs. After the hubs are out, normally the axle shafts will slide out, but due to the long shaft on mine twisting and breaking inside the differential carrier, I wasn’t able to do this.
Once the shafts are off, you can unbolt the two axle tubes from the transmission, allowing the transmission to be removed from above. Since I couldn’t pull the long axle shaft, I needed to lift the mower really high on one side, until I was able to clear the entire transmission from above (remove linkage rods and the input pulley first).
Transmission Tear Down
Once you have the Yazoo mower transmission out, place it on a bench and remove all the 1/2″ bolts along the flange. Then with some slight taps from a mallet, the two halves will separate. Be careful with this step, as many of the internal shafts and gears will fall loose.
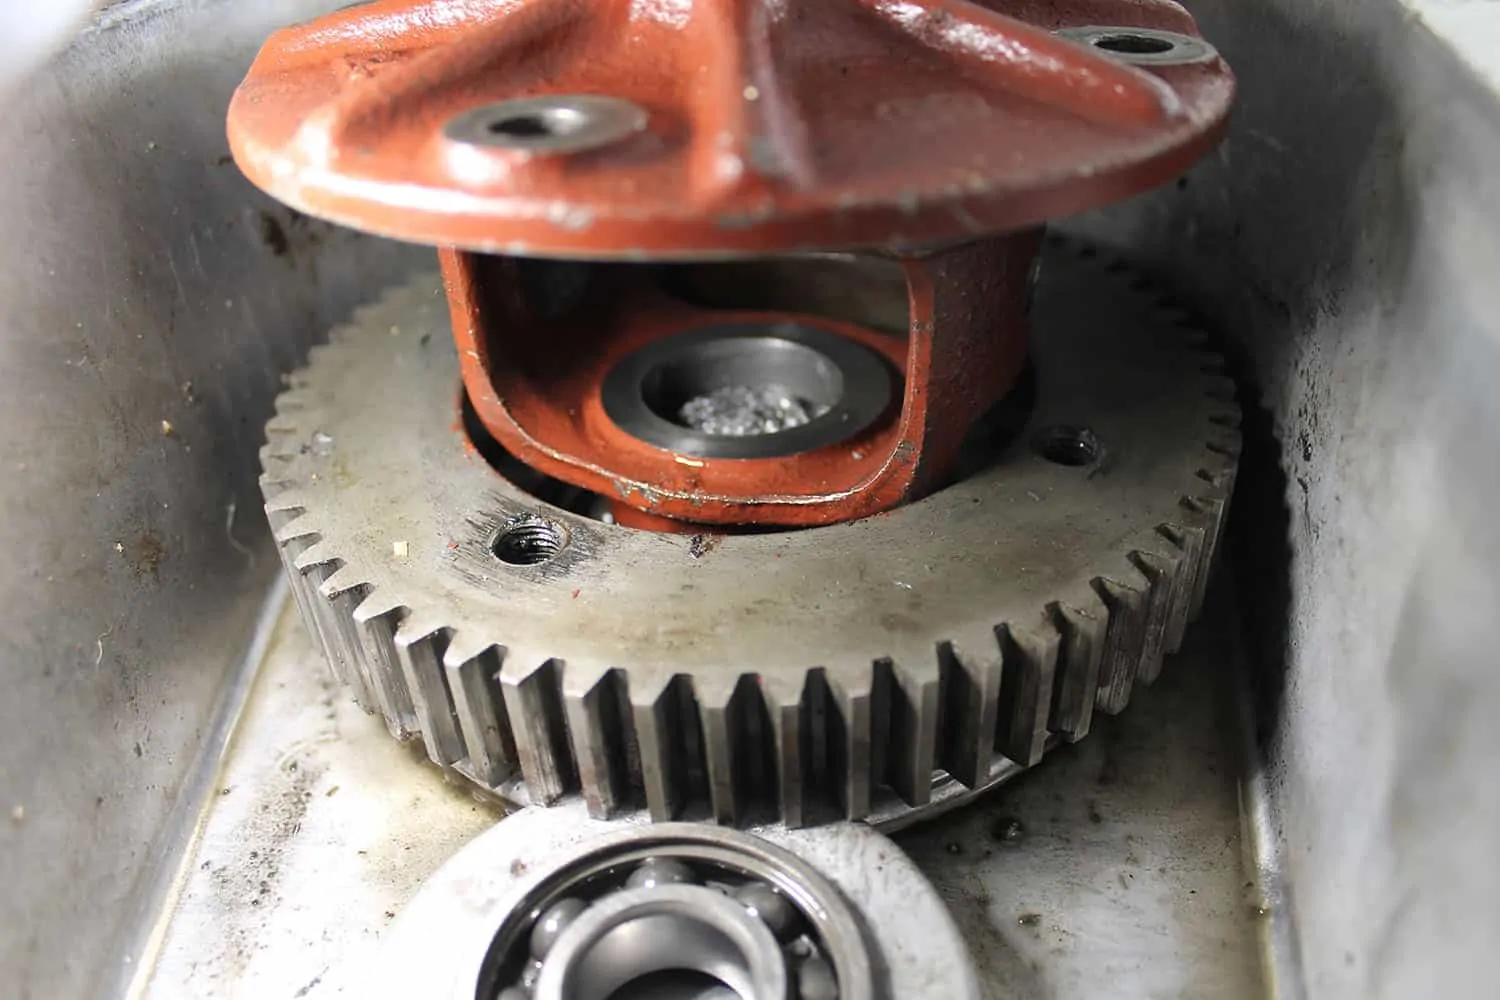
In my case, I then had to remove the cross-pin and spider gears from the differential so that I could get at the broken shaft from the opposite side. The cross-pin that holds the two spider gears is locked in place with a roll pin through the carrier.
Then with a combination of drilling out the center of the broken shaft, and a LOT of pounding with a large punch and a sledge hammer, I finally persuaded the broken axle it was time to leave the differential housing.
Bearings
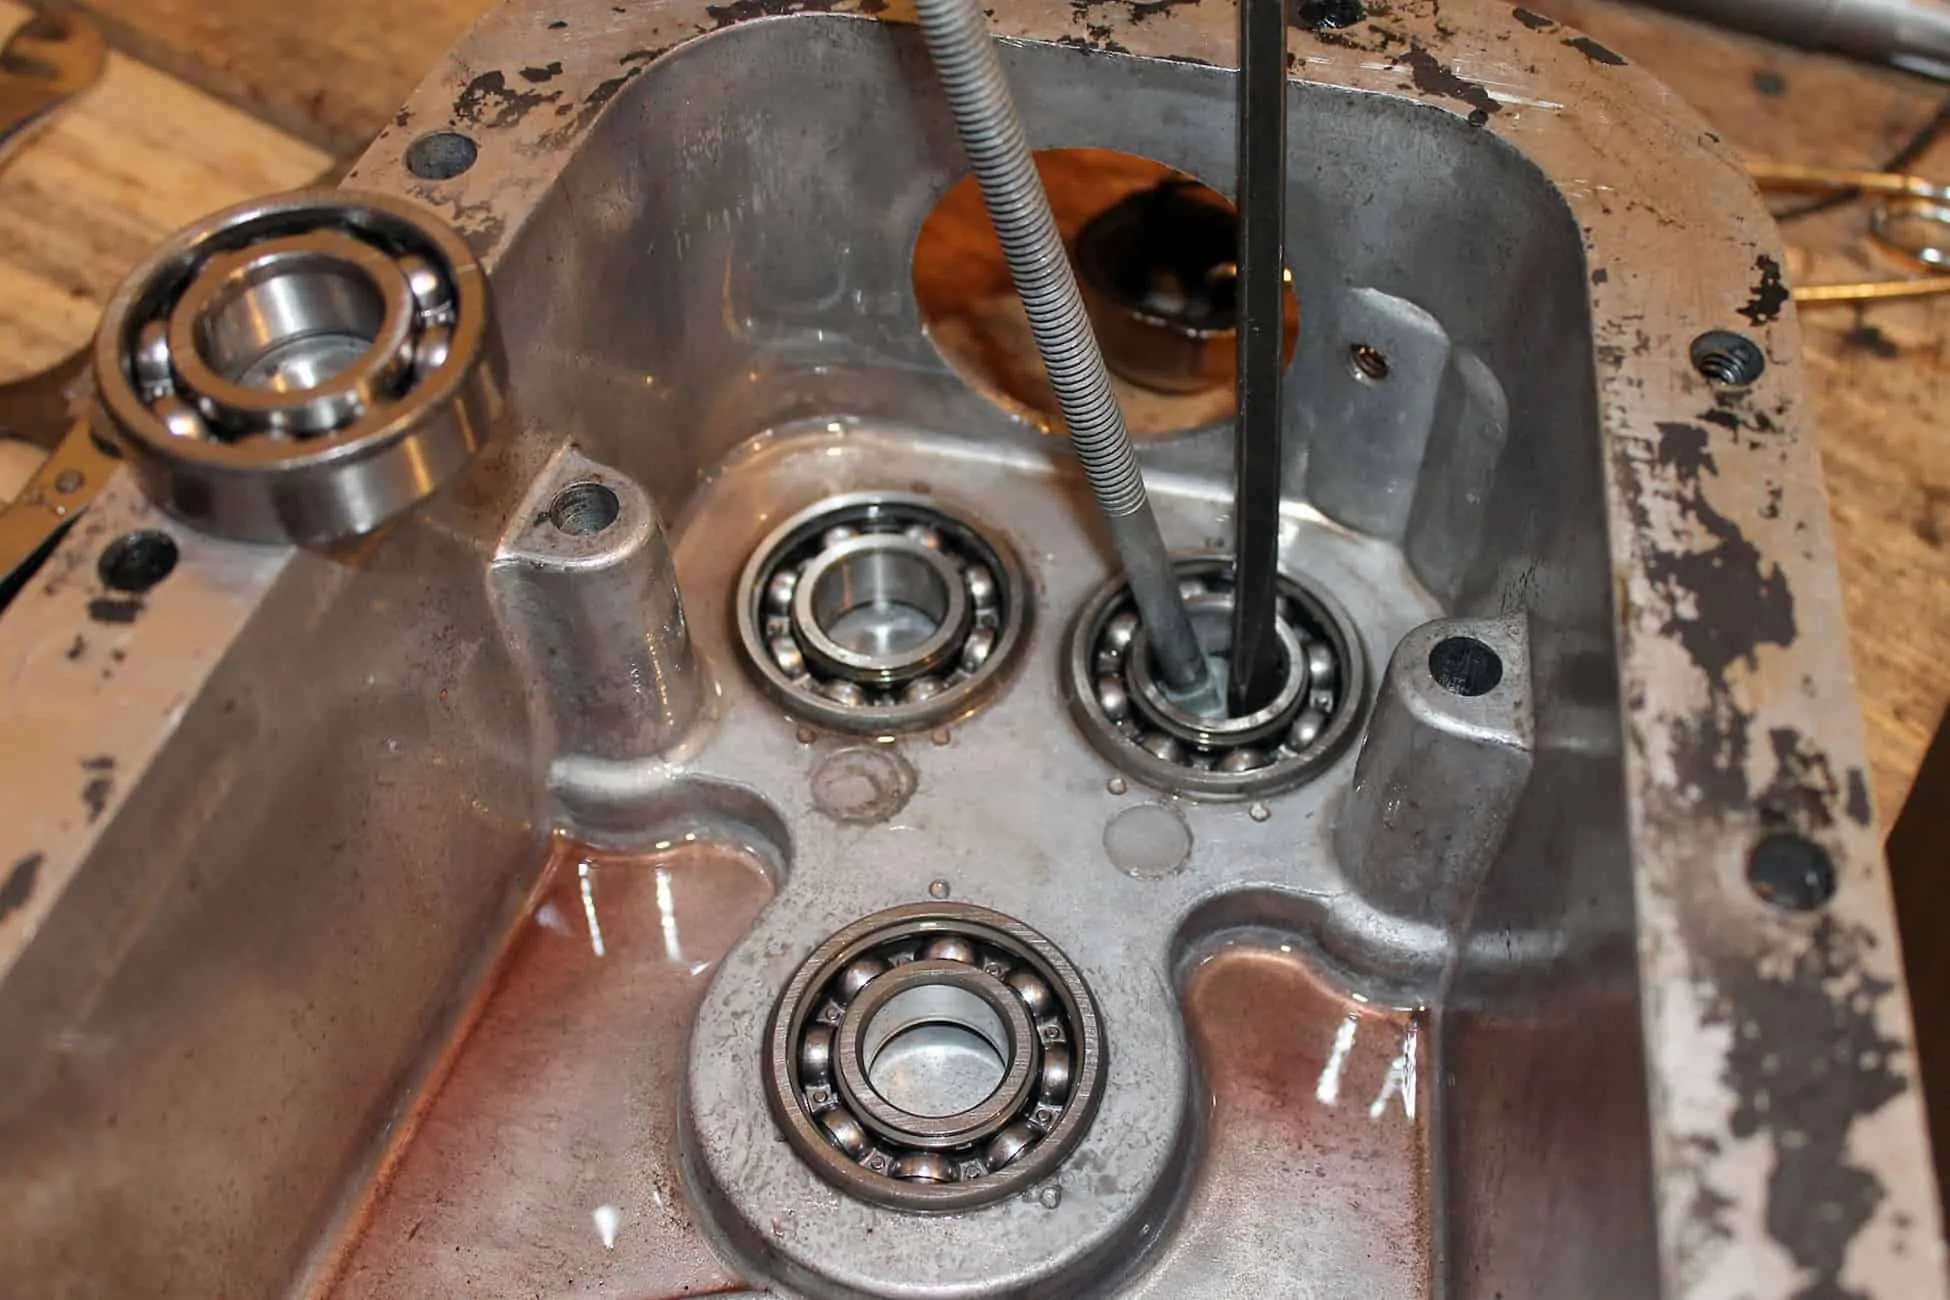
Once you have all the gears and shafts out, check to see if any of the bearings will need replaced. If so, they are a little tricky to remove. They are pressed into pockets in the aluminum housing, with no access from behind.
I found that using the end of a large carriage bolt as a fulcrum along with a large screwdriver to keep it wedged in place, you can work the bearings out without damaging the housing or the bearing. Just move each side up a little at a time working your way around the bearing.
I was able to purchase replacement bearings from Wagoner Power Equipment. The replacement bearings were made by MGM Radax and Hoover-NSK, both were stamped 6204.
Cleaning & Re-Assembly
After the bearings have been taken care, clean all of the parts to prep them for assembly.
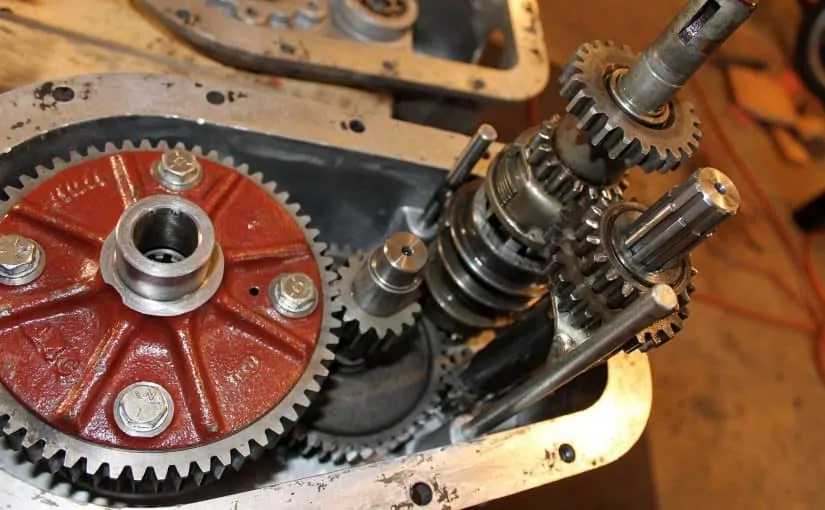
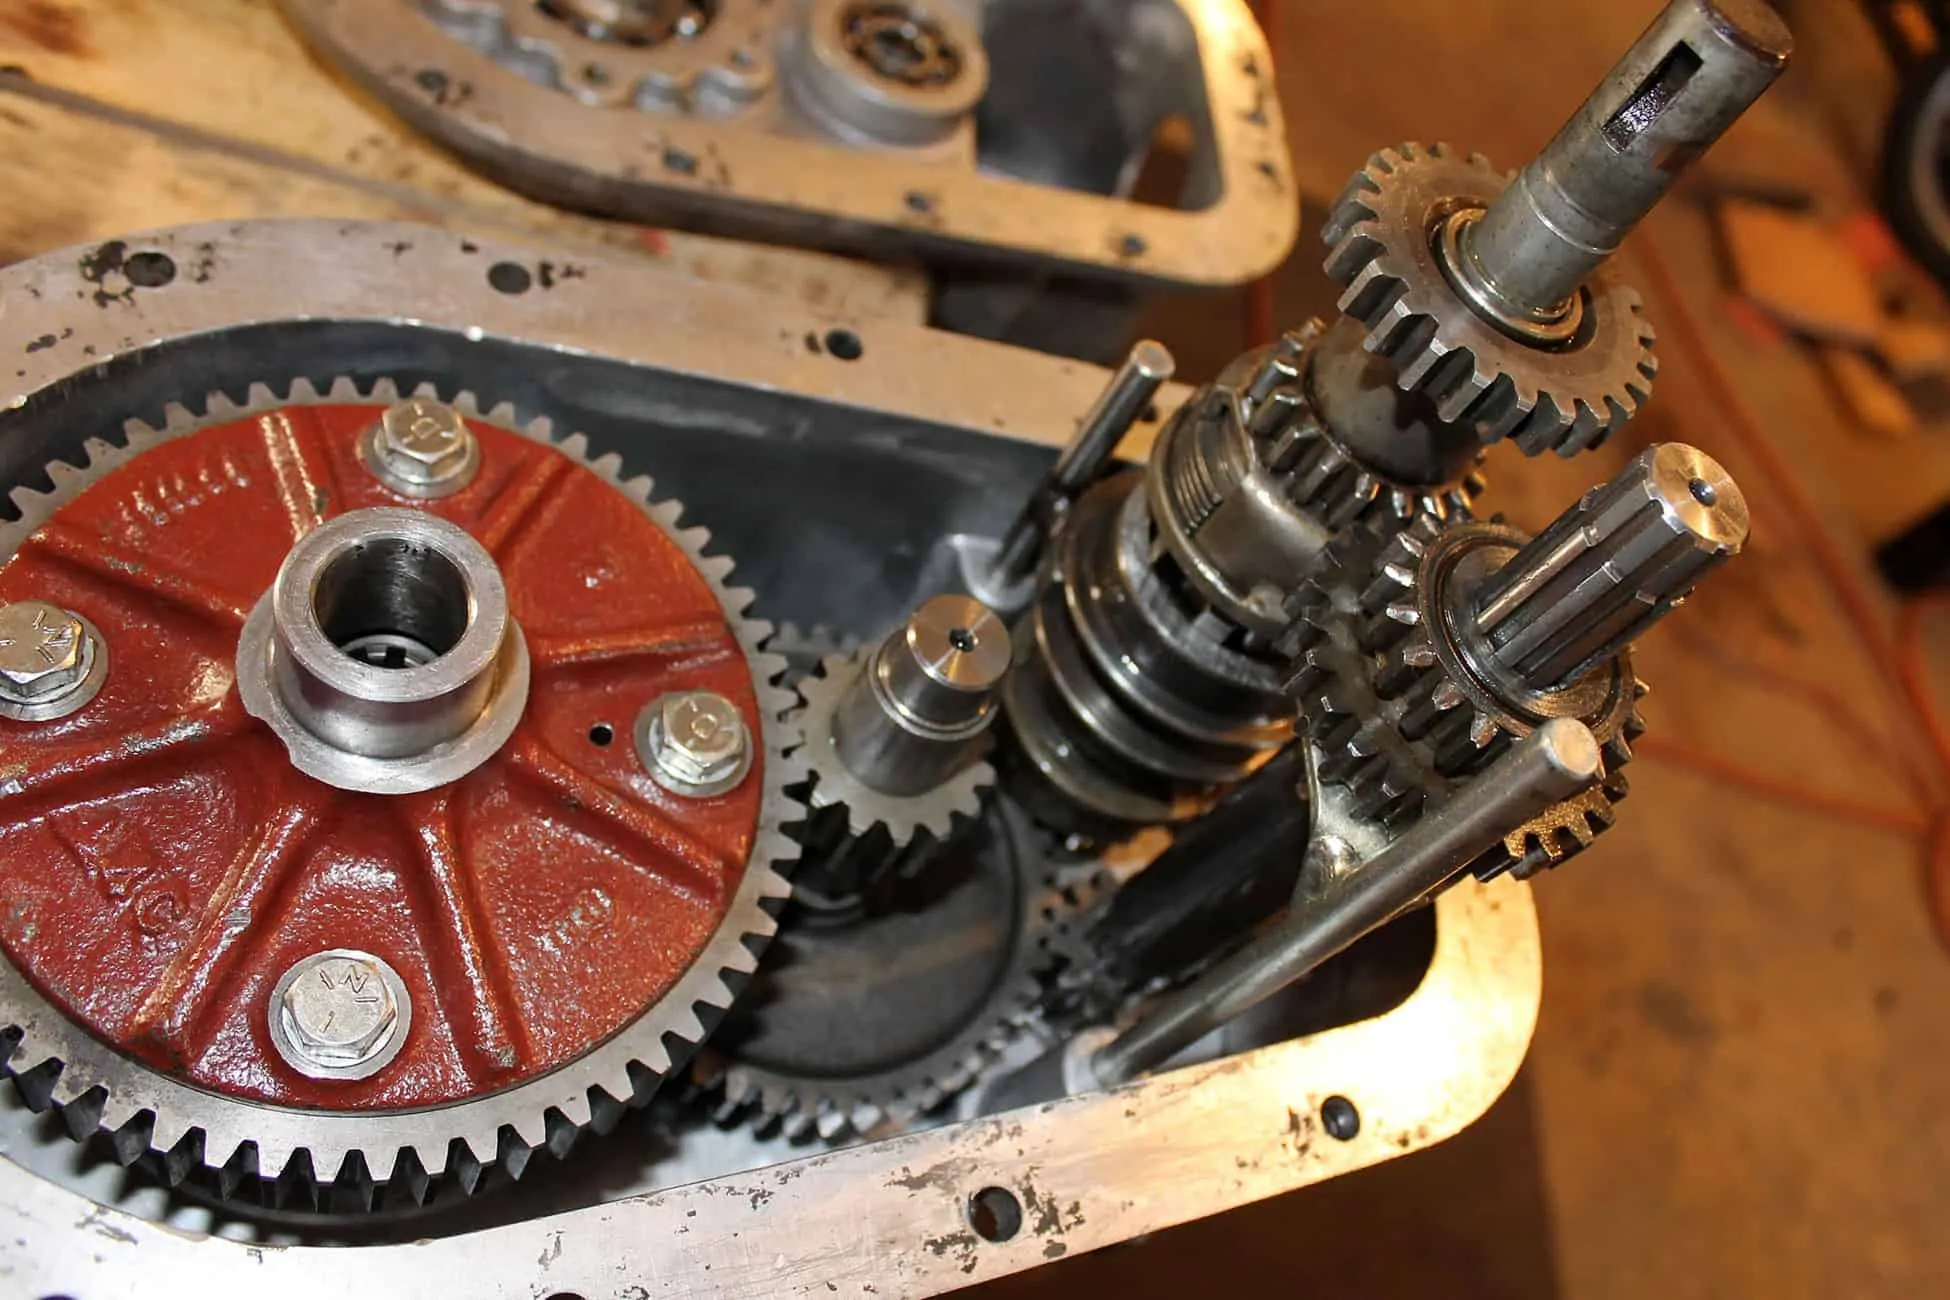
Following the parts diagram (available here), reassemble the differential carrier, and then press in the large axle bearing into the deep-side of the case. Then making sure you have the spacer between the bearing and the differential, install the differential carrier, followed by the intermediate gear. Then install both the forward speed gear shaft (along with the control rod form the other side) and the forward / reverse shaft with clutch packs (also with control rod from the other side. Once everything is back in place, it should look like this.
At this point you should be able to complete a full turn of the differential carrier. If you can’t double check that you have the spacer between it and the axle bearing, or that you have the spacers in the proper order on the intermediate shaft.
If everything seems good, place a bead of RTV Silicone Gasket Maker around the flange, and place the other half of the case on top. Line everything up, install all the bolts just a couple turns each, and then if everything still spins correctly, tighten the bolts in a star sequence finger tight, or until RTV silicone starts to squish out at each edge.
Give the RTV Silicone an hour to dry, and then finish tightening the bolts, again in a star pattern.
Installing Back into the Yazoo Mower
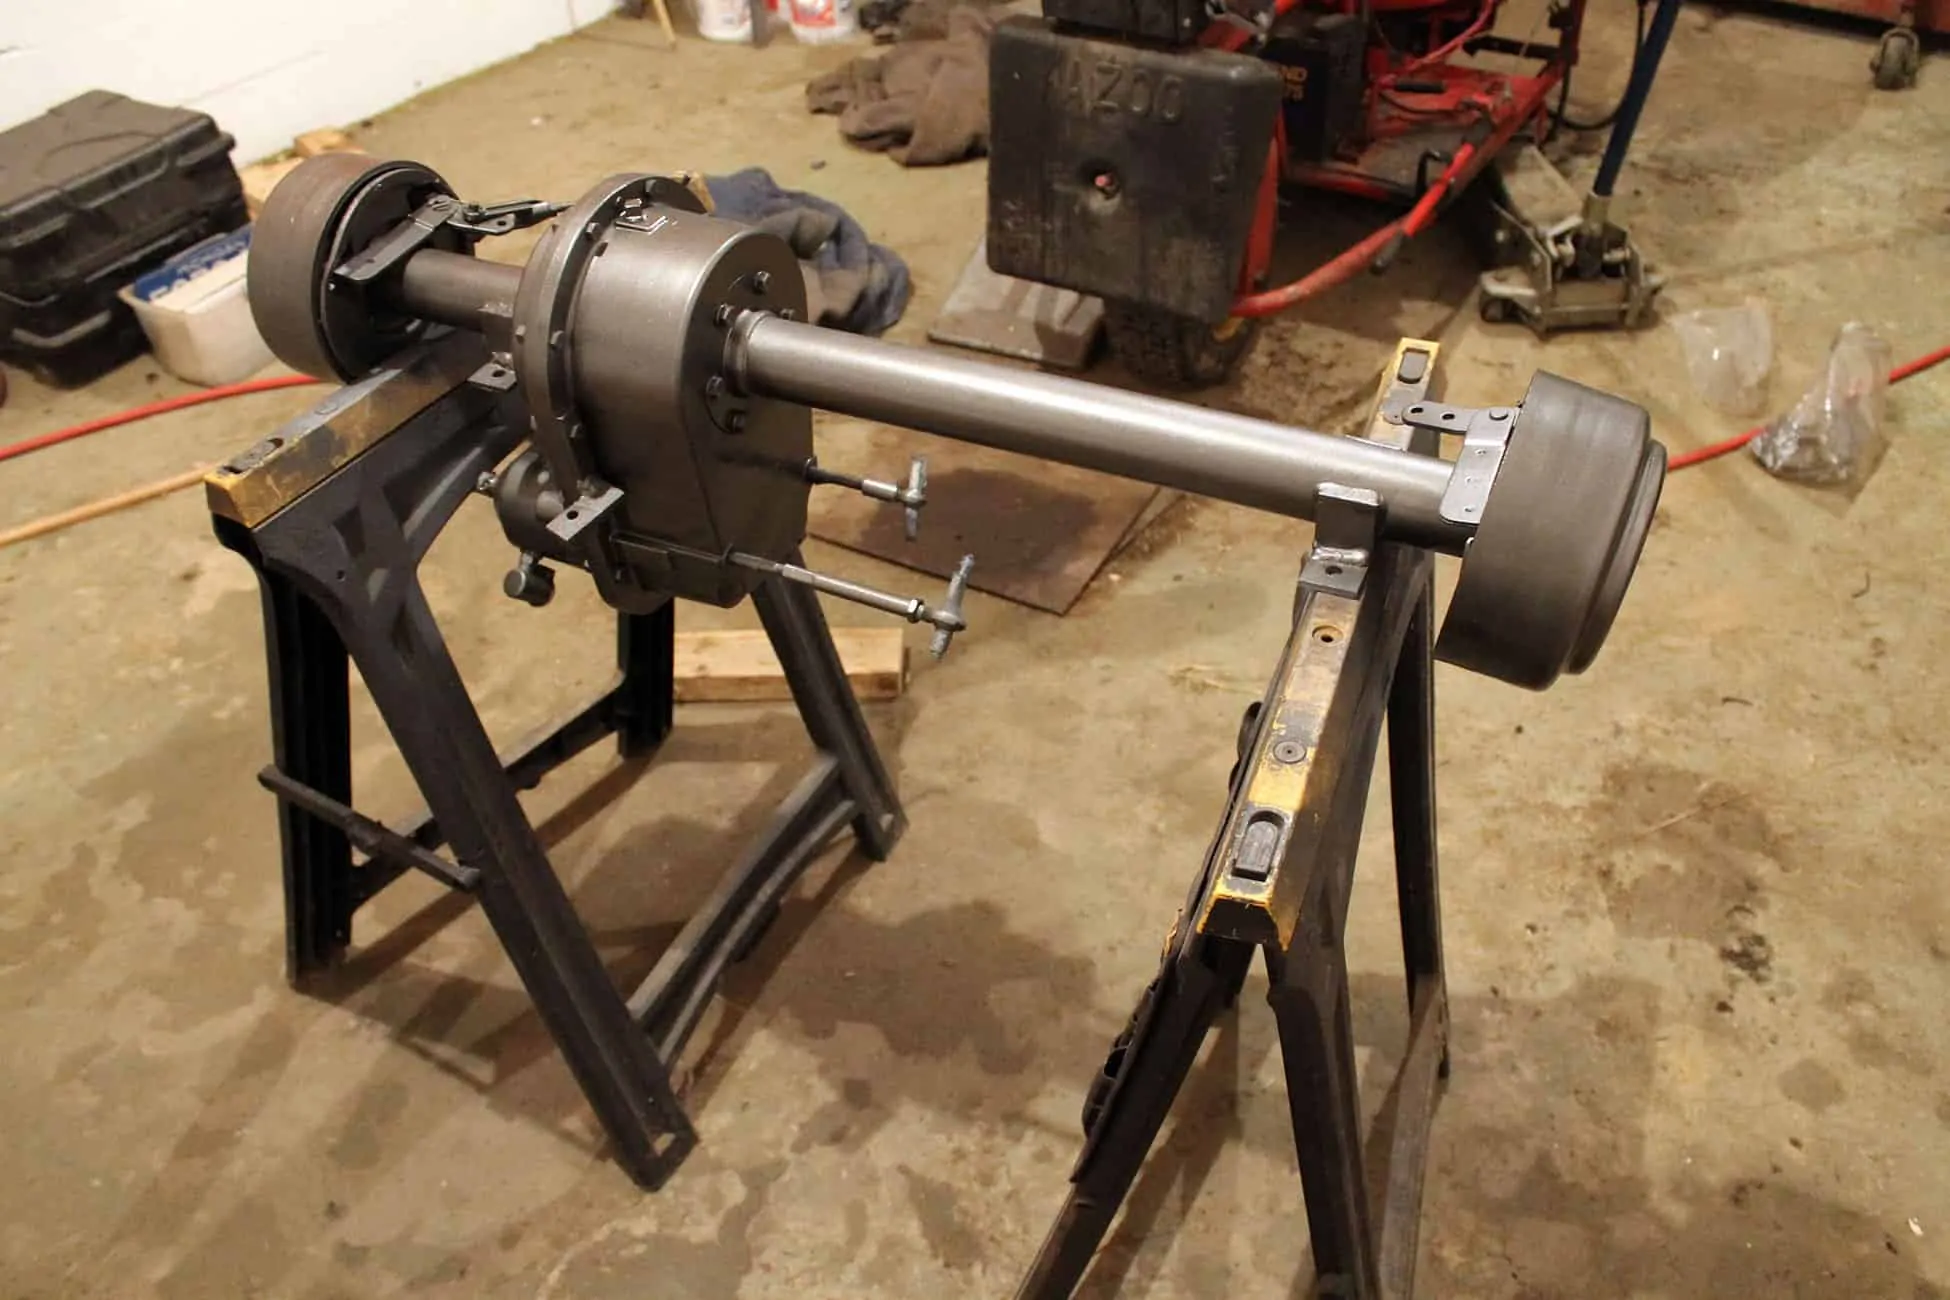
Assembly back into the mower is the opposite of removal. If the axle tubes gasket was damaged or missing, you will want to seal them with RTV Silicone as well. I took the opportunity to paint the transmission while it was out while I was at it.
Once the transmission is back in the mower, you will also need to re-connect the linkage arms below the engine mounts. I found this to be pretty difficult without removing the engine. I ended up lightly tack welding one of the end-links to a long piece of scrap steel, and then using that long handle to reach in and thread it onto the shift rod of the transmission. Once it was threaded on, a left and right jerk snapped the temporary handle back off.
Don’t forget to fill the axle up to the middle of the clutch packs. Yazoo specified 40 wt. non-detergent oil for these units.
You will probably need to re-adjust the neutral point in your shift linkage, and it may be a good idea to adjust your clutches as well.
Click here for more resources and the mods I have made on my Yazoo Mower

Old Warehouse full Yazoo parts and accessories the oldest walk behind number 1446 serial number yr36 mowers all the above anybody interested give give me a call at. Louis’s Yazoo 5700 College Street Beaumont Texas 409-866-6300 ask for David plenty of old parts
Looking for left hand thread blade adapters.I think the no is 101-003 for the left hand cut yazoo,s
Do you have the long axle for a yr60?
i’ve got my transaxle off the machine and have dropped the clutch adjustment spring i have recovered it but cannot figure out how to install it and cant find any info on it I see your pictures on the internet but none close up enough to figure it out since you dissembled one i was hoping you may be able to help. thanks for any info you can provide. r
Thank You!
I just bought a 41-PTO WM 185 60″ Mower and I drained transmission. this site gave me oil recommendations and oil fill level. I am bringing this bad boy back to life as I had experience with them back in the late 70’s when I was much younger. It has a 18hp Kohler Magnum that still sounds good.
thanks again